I think most people have given it a glancing thought but given up out of sheer fear. Installing the operating system can be a tricky procedure. Things may not work. Personal data might get forever lost. It's a risk, and an unnecessary one for most people. If it ain't fixed, don't broke it.
But what if your operating system fails, for whatever reason? What if you can no longer boot into Windows? You will probably take the PC to the store, where they will charge you precious money for restoring your system back. If you're willing to spend a few minutes reading, you will learn how to do it yourself, at no charge, at your own time.
I would like to teach you how to install Windows XP. Basically, all operating systems are much alike. Installations are very similar. By learning how to install Windows XP, you will have no trouble repeating the procedure with Windows 98, Windows ME, or even some Linux distribution.
What will you gain from this?
Confidence - you will realize computers are not black-box monsters. Independence - you will not have to rely on other people for help. You will save money - in the short term, you will lose some time; in the long term, you will benefit from saving both hard currency and time troubleshooting the operating system problems. You will be able to help your friends.What are the risks?
The beauty of all of this is - none. I will teach you how to install Windows XP using VMware Player. This great product is a virtualization software that will run just like any other application on your PC. You will be able to "simulate" the installation of Windows XP while normally booted and logged in in your Windows XP, without having to restart or risk data. The entire procedure will take place in the virtual world of the virtual machine, with hard disk changes committed to virtual space. If, at the end of the day, you don't like what you did or would like to do it again, you could just delete the file and start again. In a way, running VMware Player and committing changes to one of its virtual machines is no different than running a word processor and writing to a document.What will you need for the task?
You will need: Windows XP running on your computer, with at least 256MB of memory; otherwise things will be really slow). Windows XP installation disk; the legal issue of this subject is entirely up to you. VMware Player, which is free for download, installed on your computer. Visit EasyVMX! to create a virtual machine, or follow instructions from my VMware Player - a great friend article. Some patience and spare time. Please note that I will do an installation using Windows XP Professional SP2. Installing Windows XP, Windows XP SP1 either Home / Professional edition is basically the same, however some things will differ once you boot into Windows, mainly concerning some basic configurations and security settings. I would suggest every Windows XP user to upgrade his Windows to the latest service pack. If you have an old installation disk without SP2, you can create a slipstreamed version, which will incorporate SP2. Please refer to Slipstreaming Windows XP with Service Pack 2 (SP2) for a detailed step-by-step guide how to do it.Be advised that in VMware Player, you will not have to actually install hardware drivers for your graphic card, audio card etc. Bear in mind that these steps will have to take place after a real, physical installation of Windows XP.
VMware Player does not allow installation of graphic card drivers for guest operating systems. For that you will need the full VMware Workstation. Therefore, if you try to install other Windows operating systems while running Windows XP as the host OS, you might experience a degraded visual performance. For instance, I have been limited to the basic VGA adapters in both Windows 98 and Windows Vista Beta under Windows XP, resulting in a very slow desktop and only 4-16 colors. Windows XP as host and guest will work fine, though.
So, if you are ready, go to the next page. At the end of this multi-page article, hopefully, you will have learned:
- How to use VMware Player and build your own configuration files.
- How to create partitions and format them.
- How to setup Windows XP.
- How to create a Limited User Account.
- How to configure Windows XP to be convenient and secure.
Again, you do not have to really do any of this. You could just read and practice the next time you really install from scratch. But I suggest you try to follow the instructions and do it for yourself. You will only benefit from it.
To get started:
- Install and run VMware Player.
- Make sure you have your Windows XP installation CD ready.
- Make sure you have created the virtual machine configuration file (.vmx) and a virtual hard disk (.vmdk).
- If you are installing for real (NOT in VMware Player), unplug the cable that connects to the Internet until after you have finished setting the Windows up and configured a firewall.
To begin the installation:
- Place the Windows XP installation CD in the CD-ROM tray.
- Start the VMware Player and open the Windows XP .vmx file (e.g. named win_xp.vmx).

The virtual PC should start booting from the Windows XP disk now. If you have a SCSI hard disk or you wish to install the operating system in a RAID configuration (use several hard disks to boot the operating system), you might need to install special drivers. In reality, you would press F6 at this stage. In virtual machine, we will skip this.

You will now reach the Windows XP welcome-to-setup screen. You can choose to setup Windows XP or repair an existing installation. Using the second option might be useful if your Windows XP does not boot and you need to fix it. However, in our case, we want to start a clean installation. To do so, press ENTER.

It's time to agree to Microsoft terms of use. If you agree with what's written, press F8 to continue.

It's time to partition our virtual hard disk. An empty unwritten-on hard disk will contain no information. It will be unpartitioned. To make it usable, we need to partition it.
If you're installing on a hard disk that was previously used, partitions WILL exist. You will need to destroy one of the partitions to install the operating system. It will also cause the loss of data on that partition. So make sure your personal, irreplaceable data has been safely backed up.
In case partitions exist, you will want to erase one or all partitions (no screenshot provided) and then create new partitions. In case the disk is empty, you will just need to create new partitions. If I get lots of emails from people asking how to delete existing partitions, I will make another "simulation" and provide necessary screenshots.
In our case, we have a 6GB empty hard disk. We want to partition it. The unpartitioned space is already selected (highlighted in white). In case there are several physical hard disks available, we would see several lines of unpartitioned space information. We would then have to select (highlight) one of them (using arrow keys).
As you can see, we have 3 options:
- Setup Windows XP on a selected partition - press ENTER.
We do not have partitions ready yet. - Create a new partition in the unpartitioned space - press C.
This is what we want to do. - Delete selected partitions - press D.
If there were partitions we wanted to delete, this is what we would do.

After pressing C, we will now be given an option to choose the size for our partition. This is an important step. This is where the user has to ask himself / herself what configuration he / she might like?
Creating a single partition using all of the available space is the simplest choice. However, it is not the best choice. We want to separate the system files from our personal data. We want to create separate partitions for the two. Thus, if our system gets broken, we will be able to install it again without touching the personal data.
Thus, we will not use all of the available space. We will create a partition for the operation system and a partition for the personal data. We will create a 4GB partition for the operating system. Windows XP needs about 1-2GB to install and run smoothly. You could probably get away with less and you can definitely get away with more. It all depends on the size of your hard disk.
We want to use the 4GB partition to install Windows and later, in Windows, install programs. This will be our primary partition when booted in Windows. It will also be the first partition on our (first) hard disk.
Enter the desired size (in thousands of MB) and press Enter.

As you can see, we now have a partition ready, onto which we can install Windows XP. You can proceed to the setup now. You do not have to partition the spare space now. But be aware that it will not be usable until partitioned. Windows XP does not have a partitioning capability built-in. Therefore, unless you use some third-party software, it is wise to do it right now.
This will be our logical non-bootable partition when booted in Windows. It will serve us for personal data. It will also be the second partition on our (first) hard disk. Move the selection (highlight) with arrow keys down to unpartitioned space. Press C again to create a new partition.

Once again, we will be presented with the choice of the size. You can also see that 8MB will not be accounted for no matter what. This is because the first sector of the hard disk cannot be used to create partitions on it. It is reserved for the boot information which tells the system which partition to use to boot from. This is also called Master Boot Record (MBR). This is the most important sector on a hard disk.
We will use all of the available free space for our second partition. Theoretically, if you have a very large hard disk, you could create several logical partitions. Or leave some space free for a Linux installation. Enter the desired size (in thousands of MB) and press Enter.


Now, our hard disk is ready for the installation. Select (highlight) the desired partition - it will be the first one! - and press Enter to start the installation.

Newly created partition(s) will not be formatted. We need to format our selected partition to be able to actually install the operation system on it. We will format the partition using the NTFS file system. NTFS file system has an advantage over the FAT32 file system in its ability to handle very large storage disks, in the fragmentation of files and overall security it offers. Windows XP should be installed on a partition formatted with NTFS file system.
You should be aware that:
Windows 98 cannot read NTFS partitions. If you have Windows 98 installed in dual boot alongside Windows XP, Windows 98 will not be able to see the NTFS partitions.
NTFS file system is a closed source and therefore cannot be written to from Linux operating systems (without proper patches). This means that NTFS partitions will be accessible as read-only from Linux operating systems. But this should not worry you too much. For the time being, we are only installing Windows XP.
Select to format using NTFS file system and press Enter. We will not do a quick format, even though it saves time, because if the disk has had data previously written on it, it might not be properly wiped away.

Formatting will take some time, depending on the disk size. It can take several minutes. It's a good time to make a cup of coffee.

After the setup formats the partition, it will start copying system files. This will take several minutes.

After the files are successfully copied, the system will reboot. Do not be alarmed. You can wait a few seconds or press Enter to speed up the process.

After the reboot, the setup will start installing Windows. You will be able to move your mouse (hopefully) and read on-screen tips while the setup configures the system. You will also be able to tell the approximate time needed for the setup to complete.

After some time, you will be presented with Regional and Language Options. Here, you can set your additional languages and keyboard layouts to suit your local needs. In my setup, I used only the standard settings. After you're satisfied with your choice, click Next to continue. If you feel you missed something, you will always be able to go back by clicking Back. If enough people mail me about this step, I will add a small guide.

After the Regional and Language Options, the setup will ask you for your username. You can use anything you like. For example, I called myself USER and I have no organization.

The next step is to input your License Product Key. It should be included with your Windows XP installation CD.

Now, you need to setup your Computer name and the Administrator password. You can use whatever computer name you feel like, but you can also leave the default selection. I suggest you choose a strong password for the Administrator account; something like rdSa^tbrIw17.

The next step is to set your local Date and Time. This is pretty straightforward, I dare say.

After this step, the setup will continue to install for a few minutes. Once again, you will be able to read on-screen tips about Windows XP (no screenshot provided). The next step will be to configure your Networking settings. You can use the Typical settings, and they should work just fine. However, I have chosen the Custom settings to show you what they look like.

It is possible that you will not want one of the components to be installed. You can uncheck it at this stage. Later on, you will be able to install it if you need it. You may also want to look more deeply into what each component means and what it offers. Brief explanations are offered in the Description field for each highlighted item. During the installation, by default, all of the options are selected and you should leave them that way.

The next step is to associate your computer with a workgroup. If your computer is a member of a small household network that shares resources, you might want to give it a name of the household workgroup. Again, you may change this setting later. If your machine is a standalone workstation, you should not bother with the Workgroup name.

The setup will now continue for some time.

Eventually, after some time, the computer (virtual machine) will reboot and start loading the Windows. That is what we want to see.

Before the Welcome screen, if your graphic adapters are properly configured, like in the particular case of this virtual machine, Windows will present you with a message that it adjusts the screen resolution to a pre-defined optimized standard. You will be able to change this later on.

After changing the resolution, Windows will ask you to confirm it. Some monitors might not be able to display the desired settings. For instance, a very old monitor might be limited to only 800x600 resolution. Trying to set a higher value will result in a black or flickering screen, and you will not be able to confirm the adjustment. If within 30 seconds you do not confirm the change, the display settings will be reverted to the basics (the one used during the installation).

Finally, you will reach the Welcome screen. Click Next to continue.

You will be asked about Automatic Updates. While some may tell you that automatic updates are a good thing, I would disagree. What if an update is accidentally corrupted? It will automatically be downloaded, without your control of the event. It is better to turn the Automatic Updates off, frequently visit Windows Update for manual updates and use the web in general to get updated about possible problems that other users worldwide might have with a certain patch. The message that your computer is more vulnerable to viruses and other threats is alarming and not necessarily true.
Of course, the choice is entirely up to you.

After the Automatic Updates configuration, you will be asked about Internet Connections. If your computer connects through a router or another PC, you will most probably want to choose Local Area Network (LAN). In our case, the virtual machine is indeed a member of a network, connecting to the Internet through our host machine. During a real installation, you might want to choose the first option. You can also skip this step and do it later.
In general, I advise you to skip the process now. During this step, Windows will try to communicate with the Internet. This is not a good idea. We have not fully configured our operating system yet. For instance, we have no firewall except the default Windows XP inbound-only firewall active on the computer, and no anti-malware software of any kind. Furthermore, if you use a VPN dialer to connect to the Internet, or have not yet configured a service with an Internet Service Provider (ISP), this step will fail. It will not prevent any and all other steps from getting completed, though.
Moreover, you can prevent Internet access by setting the Ethernet tab in the VMware Player to "Host only", which will allow only the "real" operating system to connect to the Internet. Using "NAT" or "Bridged" will also allow your guest operating system to connect.
As a healthy rule, it is advisable to disconnect the Internet line from the wall while installing Windows.

Now, you will be asked to register. Even if you want to do that, now is not the time. You can do it later.

The next stage is to define the computer users. Even if you intend to have more than one user account on your PC, you should only configure one at this time. You can always add more users later. I chose a name Thor because it sounds nice.

You are set. It's time to log into Windows.

After a few seconds, you will see the Windows desktop. Basically, the installation itself is finished. Congratulations!

The procedure should have taken you about 40-70 minutes, depending on your CPU power, the memory and your own speed. You should definitely not hurry, but take time and study each step carefully. Of course, our work is not fully done.
On the next page, I will explain some of basic configurations you can do to make your Windows experience easier. Most of the stuff explained on the next page is optional.
You have installed Windows. It's time to configure a number of other items.
Installation of drivers
Install your video drivers. Change your monitor refresh frequency and screen resolution to fit your needs. Install your audio drivers. Make sure you have properly installed the drivers by testing out some sample music track. Install your other drivers, for instance USB 2.0 drivers, printer, UPS etc. After you have successfully installed your environment, it's time for some true geek time.Tweaking
Windows XP ships out in a default configurations that is rather loose. It is meant to suit as many people as possible at the same time, which is rather impossible. You can make some small yet pretty powerful changes that will make the overall feel a whole lot smoother.Please note that this guide is not meant to be a comprehensive Windows user guide. You can get a pretty reasonable help by pressing F1. Furthermore, there's a wealth of information available online.
Most of the instructions following will not be accompanied with screenshots. There are too many of them, and it would get rather boring after a while. However, I will give you a basic overview to help you get oriented, though most likely if you decided to read through this article AND decided to install Windows XP from scratch in a VMware Player (or for real), the chances are you most likely do not need a basic overview of the Windows XP functionality.
Taskbar
Taskbar is a field between the Start Menu and the System Tray and will show your active applications as small bars. It can also serve to place shortcuts (as Quick Launch).

Start Menu
Start Menu gives access to all of the programs and applications installed on the computer.

System Tray
System Tray is used to show small icons of programs loaded into memory and running.

Performance & annoyance tweaks
The below tweaks will improve visual performance, make the Windows look less flashy and free hard disk space by reducing the unnecessarily large default storage certain functions take.If you have doubt, do not do these steps without being sure how to revert them. Do not do these steps if you do not understand what they mean. Like I said, this guide is not a step-by-step Windows help. Use the Help and Internet to get fully acquainted with Windows. You can always do these tweaks at a later time.
Windows XP Tour
Click on the Windows XP Tour icon in the System Tray.
When the Window XP Tour pops up, click Cancel and you will never be bothered again.
Disable Security Center alerts
Right click on the Security Center system tray icon > Open Security Center. On the left-hand side, under Resources, click on the bottom option Change the way Security Center alerts me. Untick the three options (firewall, anti-virus and automatic updates).
Changing Start Menu view to Classic
Right click on the Taskbar > Properties.
Under Taskbar options, tick Show Quick Launch.
Under Start Menu options, tick Classic Start menu.
Changing Windows display to Classic
Right click on the Desktop > Properties.
Under Themes, select Windows Classic theme.
Change Control Panel view
Start > Settings > Control Panel.
Switch to Classic View.
Resize the System Restore space
Right click on My Computer > Properties.
Under System Restore settings, slide the bar to desired percentage.
Resize the Recycle Bin space
Right click on Recycle Bin > Properties.
Slide the bar to desired percentage.
Resize the Internet Explorer cache
Right click on Internet Explorer > Properties.
Under General > Temporary Internet files click Settings.
Select the cache size to no more than 50-100MB.
Format the remaining hard disk(s)
We have created a roughly 2GB size hard disk while partitioning. It's time to format it now and make it usable. Double click My Computer. Select the hard disk (most likely local disk (D:), certainly NOT local disk (C:)), right click > Format.We want to use this hard disk for personal data. Therefore, we will format it as FAT32, because we might like to be able to write to it from other operating systems, like Linux. Rename this disk to DATA or something similar.
This is, of course, an optional step. You may or may not create additional partitions while installing the system for real. It's up to you. I advise you to use partitions, as they improve security and order.
Creating a Limited User Account (LUA)
Most people use their default administrator account. This is OK, if you know 100% what to do in case of serious malware infection. Otherwise, setting up a limited account can be a good practice. Regardless of whether your daily needs require that you use administrator account or a limited account, it is recommended that you:- Password protect the default administrator account. To do this, boot into Safe Mode, log in as the Administrator, head in to Start > Control Center > User Accounts. Password protect the account with a strong password (something like acD221oOm23^K2W). We have done that during the setup, but it does not hurt to check out. This can also be a good practice to see what Safe Mode is and how it works. To boot into Safe Mode, press F8 during the boot up. This might not work in VMware Player.
- Disable the Guest account, if it isn't already.
- Delete the .ASP account, if it exists.
- Reboot into normal mode and password protect your own account with a solid, strong password.
- Access User Accounts (see above) and select Create a new account.
- Select a name for your limited account.
- Select the type for your limited account; naturally you want to selected Limited.
- Create the new account.

Name the new account:

Select the account type to be limited:

Once it is created, you can rename it if you like, change its icon and password protect it.

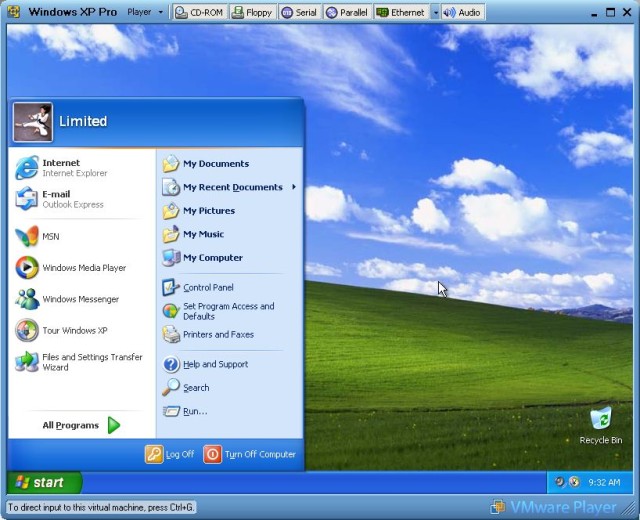
To see what a Limited User account looks like, just log off as Thor (or whatever your name is) and log in as Limited.

As you can see, Limited is a new separate account and all previous changes we did no longer apply. We will have to configure things again.
Limited account should be indeed limited. How can we know Limited is restricted?
Let's try to access the Group Policy editor. Group Policy Editor (gpedit.msc) is a powerful tool that allows any Windows administrator-type user to set global or user rules called Restriction Policies. These policies can range from white-listing files that can be executed on the computer to preventing the use of command line, prevent access to Control Panel and much more. It can also be used in a very beneficial way to improve privacy and security. I will address that in another article.
To start the Editor:
Start > Run > gpedit.msc

Indeed, if we try to access the gpedit.msc, under a limited account we expect to receive an error message.

As expected, Limited is a limited account and thus cannot access gpedit.msc. In a way this is a good thing. If you cannot access certain options, neither will virii, trojans and other types of malware be able to do that. As a limited account user, you will not be able to install software. Even if you inadvertently trigger a bad file on your desktop, it will not be able to propagate and cause harm. Limited account is a good way of preventing the user himself from making serious judgment mistakes in his day-to-day use. You should bear in mind that these restrictions could impair functionality of certain programs. You will also have to log in as the administrator to perform system updates, like anti-virus definition updates.
To run applications that require administrative privileges, you can try to use the Run as ... shell option - right click on an application and select Run as ... Alternatively, you can use DropMyRights to run software with reduced (limited) privileged under an administrator type account. By the way, changing desktops in the administrator and limited account is a good idea. It's your best visual indicator which account you're using.
Internet
Create your first System Restore point; this will be your "reference" restore point, a clean system installation. Configure your Internet connection now - if you're using direct connection, just plug the line back into the socket. If you're using VPN dialers, call your ISP and ask them to help you configure one.Updates
Before installing Windows XP on a PC, I suggest you create a CD containing all your favorite software, like firewall, anti-virus, java engine, browser, mail client, and more. That way, you will not require an Internet connection to properly secure your PC. If you do not have your favorite tools ready, do it like this then:- Open Internet Explorer once. Go to Mozilla Firefox site. Download and install Firefox. Make it your default browser.
- Head to the site of your favorite firewall vendor. If you do not have one, or want a free solution, try ZoneAlarm Free. Install the firewall.
- Head to the site of your favorite anti-virus vendor. If you do not have one, or want a free solution, try AVG Free. Install the anti-virus. Perform a full update. If firewall prompts you, allow it.
- Now, perform Windows Update. Install the patches you want. Usually, you would like to install most of the critical patches. But I do suggest you read carefully about each update and decide whether you really need it. Since you may have the automatic updates turned off, make this check at least once a month. Microsoft usually release updates on first Tuesday every month.
- You might want to use Java on your computer. You might want to try Sun Java.
- You might want to use a mail client. I suggest you try Mozilla Thunderbird rather than the default Outlook Express.
- You might want to have an Office suite on your PC. Open Office is a great, free product.
General rules that can make your PC life easier
You might want to defragment your hard drive once a month or so to boost its performance. Keep your private data separate from the operating system - on the second partition we created. If you have a large hard disk, or better, several hard disks, do not hesitate to make even more partitions. Back your data frequently across the system (partitions, hard disks, other computers) and to hard copies (CDs, DVDs, USB drives).Create a System Restore checkpoint before installing any software. That's it. Your computer is pretty much setup. You have learned how to install Windows XP, create multiple partitions, create a user account, all of that in less than two hours. It's time to lean back and relax. You won't be needing those technicians any more. Who knows, you might even teach them a trick or two?
Enjoy!
Source


No comments:
Post a Comment